How to Get a Visa For a Foreign Country
There you are, fresh off your decision to travel the world and get out of your current funk. You’ve researched places to go in your destination, packed your camera, typed your itinerary, purchased your plane tickets, got your traveler’s insurance, and you’re all set.
But wait a minute.
Not so fast.
During your preparations, you may have heard the word “visa” thrown out a time or two. Maybe you only think of the credit card brand. I know I did the first time I heard it.
The truth, however, is that a visa could be the final ticket you need to get you where you’re going.
If you're traveling in your own country, you don't need to worry about this. Likewise, depending on the country you’re visiting and the length of your stay, the visa may or may not be required.
When Do I Need a Visa?
Most of the time, countries allow you to enter their premises for up to 90 days before requiring a visa. In the United States, that 90-period is known as the “Visa Waiver Program.” With this, you arrive with your return ticket set within 90 days, and so long as you leave by then, no harm, no foul.
Other countries like Panama, Algeria and the Bahamas, however, allow up to 180 days before requiring a visa.Further still, countries like Afghanistan, Brazil, China, India, and Laos require permission from their government even for short visits. Therefore, it is up to you to do the research on visa requirements long before you’re ready for your trip.
Most visa applications don’t take an incredibly long time to process, and the recommended time to apply is usually within 1-2 months of your visit (but you should research it long before that!)For a complete list of countries and length of time you can visit without needing a visa, check here. Conversely, if you already have your country chosen, Google “(Country) Immigration Site” and go directly to the official website.
Types of Visas
The type of visa you'll need directly correlates with the type of trip you’re planning and the country you’re visiting.
For example, if you’re heading to New Zealand (which, why wouldn’t you?), the visas include: Visitor, Student, Working Holiday, Work, and Resident. Each visa comes with different requirements in regard to length of stay or the need for a job offer, and the intensity/cost of the application depends on the type of visa you desire.
As for me, I did the Working Holiday Visa for my year in New Zealand. That visa is only valid for a year if you’re from the United States, but countries like England and Canada are able to extend it for an additional year if they'd like.
On the flip side, if you’re coming to America, there are a multitude of visas to choose from. All options are separated and split into two different categories: Nonimmigrant and immigrant.
From there, you must sort through all of the visa options before you choose which one suits your needs most.
If you’re interested in a place like Brazil, there are 10 different types of visas broken down into three categories: Tourist (VITUR), Temporary (VITUM), and Permanent and Diplomatic/Official.
The general concept behind the visas for each country revolves around tourism, brief visits, or full immigration into the culture. They’re designed to help the country’s government keep an organized track of people entering and exiting the country.
Although the application and need for the visa varies by country, it’s always a good idea to research the government for the country you’re visiting to avoid any surprises — or worse, deportation.
Paying for Your Visa
When it comes to savings, don’t forget to factor in the cost of the visa.
Somehow, when I applied for my visa to New Zealand, I got lucky and didn’t have to pay anything. My application fee was waived, but how that happened is beyond me. The normal cost of the application is between $150-$300, depending on the currency you’re using.
At that, American visas don’t necessarily come cheap either, but it all depends on the type of visa you apply for. In the nonimmigrant category, most visa application fees range from $160-$265.Regardless of how much the application is, the further out you know the cost, the less stressed you’ll be when it comes time to apply.
The Application Process
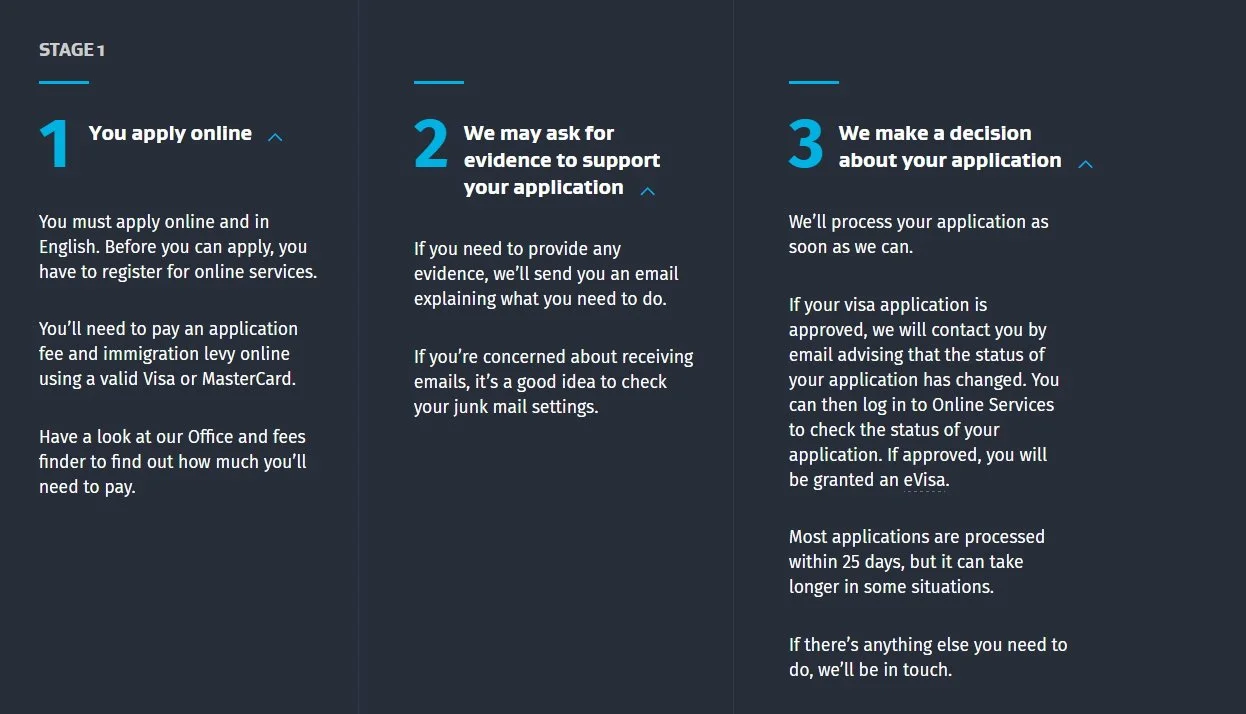
Via New Zealand Immigration
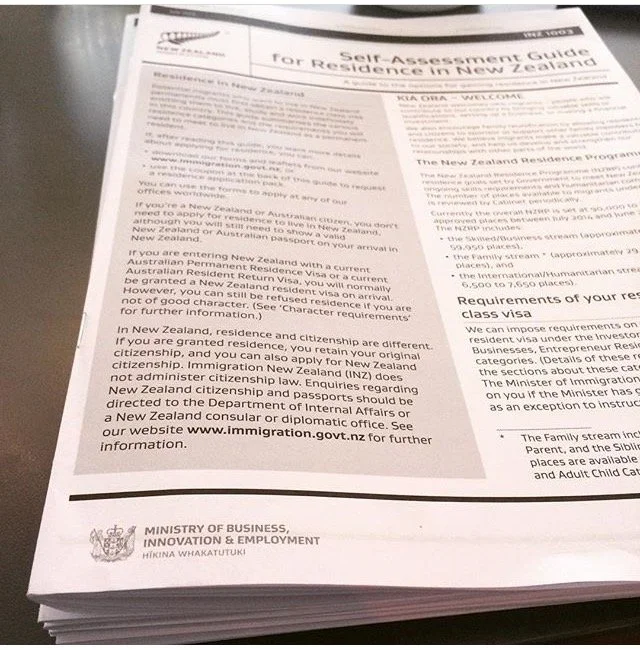
When I applied for my Working Holiday Visa in New Zealand, the application was as simple as this:Granted, I did also intend to apply for permanent residency, to which I was given the following stack of papers:
Then, after realizing I didn’t meet the requirements for permanent residency (due to my lack of sponsored job), and my inability to extend my Working Holiday Visa (since I'm American), I accepted that a year was all I'd get.As for my New Zealand friend Josh, who’s joining me on my road trip across America, applying for his visa came with a few more struggles than I faced going to New Zealand.
We opted for the B-1/B-2 visa and began preparations early .The application for his visa was $160 USD, which came out to about $230 NZD. After the application, Josh had to arrange an in-person interview at the US Embassy in New Zealand, where he was fingerprinted and questioned about his trip. After lacking the necessary funds for the trip (which is generally checked in every country), his initial application was denied.
Had we procrastinated on his application, this hit could have damaged the entire trip. As it was, since we applied three months before his arrival, we had some more time to juggle and add to our savings.
I cannot emphasize this enough: To remove the stress of visa applications and deadlines, prepare early.
Having the Proper Funds
Most countries ask, but not necessarily every country will check your funds before approving or denying your visa. As for me, my savings account never got checked when I went to New Zealand. Don't assume they won't check your funds -- you may run into the same problem Josh did.
While the idea of “minimum funds required” may seem a little harsh, the reason behind it is simple: The government of your intended country wants to make sure you don’t come onto their turf and become a nuisance.
If you show up for a six-month trip with $200, they'll assume you won’t be able to make it without becoming a bum on the streets. If that happens, you add a negative strain on the country’s economy.
Having the proper savings (especially having said savings after you’ve purchased necessary tickets and visas) is another reason to start preparing for your trip earlier rather than later. Generally, $5,000 is considered sufficient for at least six months, so keep that goal in mind while you save.
Visa Sponsorship
If you know somebody in your destined country, they may be able to provide you with all or partial sponsorship. I co-sponsored Josh’s application for America, as it took our combined savings to get his visa approved.If you’re an American citizen looking to sponsor somebody, know you’ll need to follow these requirements:
Fill out an I-134 form, or an Affidavit of Support, which is essentially just an application stating you’re the sponsor.
An official letter of employment confirming your employment and income. Your boss must print and sign this on official business paper.
3-4 recent pay stubs.
An official letter from your bank on business paper stating the date your account opened, average income/savings, and present balance.
Bank statements from the last six months to accompany this.
A letter to the consulate stating who you are and why you’re sponsoring the applicant.
An invitation letter to said applicant, to be shown to the consulate. The letter must explain why you’re inviting them and how you intend to take care of them once they’re here.
Income tax documents for the last 3 years.
A copy of your birth certificate, or every page of your passport (including the blank ones) as proof of your U.S. Citizenship.
These requirements vary by country, and that’s assuming you’re headed to a country that allows sponsorship. If you intend to sponsor someone, be sure you research your requirements and do your proper part.
What to Do Once Your Visa is Approved
Dance. Cry. Celebrate. In that order.
Of course, this all depends on where you’re going and how long you’re intending to stay there. If, however, your trip exceeds the maximum stay for visitors, most of this process is a major headache. Worse, if you’ve planned everything before you’ve gotten your visa, a rejection of your application can severely hinder your trip.
But do not fret.
Firstly, remember that not every visa application may end up in a headache. Compare my experience with Josh’s, for example.
Secondly, remember this age-old cliche: Where there is a will, there is a way. Things tend to fall in place (albeit with seconds to spare sometimes) when you turn all of your focus and hope into achieving a goal you’ve set for yourself. At that, when you make travel your priority, everything will work itself out.
Time to Pack Your Bags
Now, with that last, tiny golden ticket, your trip preparation is (hopefully) complete. Time to pack your bags and head out on the trip of a lifetime. Understanding the process of acquiring necessary visas can be daunting, but a great weight will rise off your shoulders as soon as you’ve sorted it out.No one ever said traveling was easy, but everyone does admit that the stress involved is worth it. The experiences you’ll accumulate on your trip make all the stress leading up to it look futile. Better yet, once you’re in your destination, you’ll laugh at every roadblock that tried to stop you.


